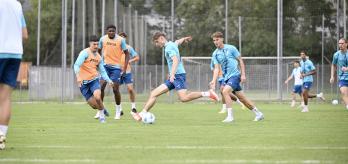
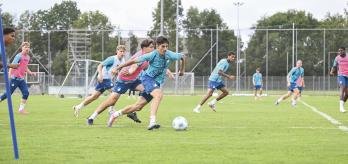
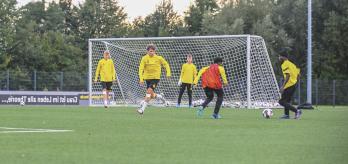
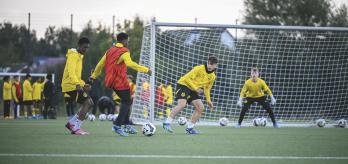
Nubbemeyer introduces his favorite exercises, each designed to ensure his players maintain intensity both on and off the ball. Nubbemeyer was influenced by experienced professional coaches like Ralf Rangnick, whose tactical insights helped shape his understanding of the game.
Session overview
Activity 1: 3+GK v 2+GK
The basic idea behind this exercise came from Ralf Rangnick and Ralph Hasenhüttl. For the defenders, the aim is to temporarily cancel out the attacking side’s numerical advantage by deploying a high press. To do that, the defenders have to be on their toes and looking to anticipate square balls. The attacking side are aiming to do the exact opposite, namely to relieve the pressure as quickly as possible and make the most of their extra player. With that in mind, they should try to force the defence into 2v1 situations and to beat the press by passing the ball into space.
-
Mark out a 26m x 18m playing area with a halfway line. Then set up two goals, both guarded by goalkeepers.
-
Form two teams of 7 players each (including goalkeepers), and position the players at points A, B and C as shown.
-
A starts the exercise by passing to C, who can either lay the ball off first-time or take a touch before playing a pass.
-
The two defenders (shown here in red) press immediately.
-
B runs into the playing area to create a 3v2.
-
If the reds win the ball, they should counter-attack, and the blues should counter-press
-
Swap roles after the exercise is completed.
-
To do this, 2 blue players should stay where they are and become defenders.
-
Then A starts the next run through the exercise by passing to C. B subsequently runs into the playing area, and so on.
-
By pushing up when the ball is laid off, the defenders can temporarily turn the 3v2 scenario into a 2v2.
-
The defenders should anticipate square balls and push up to defend against them.
-
As soon as a defender wins the ball, they should look for the attacking transition.
-
The attackers should make the most of the extra player.
-
It is important to create 2v1 situations and exploit them.
Activity 2: 4+GK v 3+GK
This 4v3 exercise follows the same rules as the 3v2 in the previous drill, but the addition of one player to each team makes the exercise more complex.
-
Mark out a playing area measuring approximately 30m x 25m with a halfway line and two goals.
-
Form two teams of 10 (including goalkeepers) and position the players at points A, B, C and D as shown in the illustration.
-
A starts the exercise by passing to C, who must either lay the ball off first-time or take one touch before making a pass.
-
The 3 defenders press immediately.
-
B and D run into the playing area to create a 4v3.
-
If the reds win the ball, they should counter-attack, and the blues should counter-press.
-
Swap roles once the drill is completed.
-
To do this, 3 blue players should stay where they are and become defenders.
-
A then starts the next run through the exercise by passing to C. B and D should subsequently run into the playing area.
-
A triangle is an effective shape to defend in.
-
By pushing up when the ball is laid off, the defenders can temporarily turn the 4v3 scenario into a 2v2.
-
The defenders should be on their toes, try to anticipate square balls and push up at the right moment.
-
As soon as a defender wins the ball, they should look for the attacking transition.
-
The attackers should make the most of the extra player.
-
It is important to create 2v1 situations and exploit them.
Activity 3: 4v4 with 2 switching players
In this 4v4, the attacking team should use the support of the “switching players” to move the ball quickly towards goal and beat the opposition defence.
-
Set up a 40m-long playing area with three goals and a goalkeeper in each goal as shown.
-
Form a blue team with 8 players (including 2 goalkeepers) and a red team with 7 players (including 1 goalkeeper).
-
Choose 2 holding midfielders whose job it will be to switch the play (shown here in yellow).
-
Distribute the players across both sides of the playing area as shown in the illustration.
-
The blues should set up with 1 striker, 1 winger and 1 player in the half-space on each side of the playing area. These players are not allowed to leave their starting zones.
-
The reds should set up with a back 4, protected by 2 central midfielders in front of them.
-
The coach starts the exercise by passing to 1 of the switching players.
-
The blues should look to score from the 4 plus 1v4 scenario.
-
They can use the switching players to shift the ball between the two halves of the playing area.
-
If the defenders manage to win the ball, they should counter-attack towards the goals at the other end of the playing area.
-
The defensive unit should shift across together in a low block.
-
The defenders can temporarily cancel out the attacking team’s numerical advantage by pressing proactively.
-
The defence will sit deep. The attacking team should stretch them and make them move around.
-
It is important to create and exploit 2v1 situations.
Activity 4: From 5v3 to 5v3+GK
The aim of this exercise is to make the most of the overload to move the ball towards goal – first in a tight space and then in a realistic game-like scenario.
-
Set up a 60m-long playing area with four goals (three of them guarded by a goalkeeper) and mark out two 20m x 20m squares as shown in the illustration.
-
Form a blue team with 11 players (including 2 goalkeepers) and a red team with 7 players (including 1 goalkeeper).
-
The blues start with the ball in one of the square zones and play 5v3 against the reds. Once they have completed five passes, they can try to attack the goal.
-
If the reds win the ball, they can counter towards the nearest goal.
-
If the blues manage to pass the ball forwards out of the zone, 2 players can make supporting runs. The blues then have seven seconds to attack the goal in a 5v3 scenario.
-
If the reds manage to win the ball outside the square zone, they can counter-attack towards one of the three goals at the other end of the playing area. A player from each team can leave the square zone to support their team-mates.
-
Once you have played the exercise through four times, swap the teams around.
-
The defending players should hunt down the ball and put the opposition under pressure.
-
After breaking the attackers’ momentum and winning the ball, the focus should be on countering at speed.
-
Where possible, passes out of the zone should be played into the half-spaces on the other side of the playing area. This relieves the pressure and helps to create an overload quickly.
-
The attacking players should make the most of their momentum and finish the move quickly.
Activity 5: The 3-square rondo
The “3-square rondo” is all about reacting quickly when the play is switched between the squares, and pressing as soon as there is a turnover.
-
Mark out three 14m x 14m zones with a 4m gap between their nearest points and set up six mini-goals as shown.
-
Form three teams of 6 players, and position the players as shown.
-
The blues start the exercise in Zone 1, playing an 6v3 possession game against the reds.
-
Once they have completed five passes, they can switch the play to another zone.
-
The defenders stationed between the zones are allowed to intercept passes between zones.
-
If the blues manage to switch the play, the third team and 3 defenders move across to the new zone. Meanwhile, the blues occupy the other two zones, with the same number of players in each zone.
-
If the reds manage to win the ball, they should counter-attack towards the mini-goals.
-
Swap the teams over whenever a goal is scored.
-
The defending team should keep the intensity up and hunt down the ball.
-
Defenders should anticipate passes.
-
It is important to put the opposition under pressure.
-
The team in possession should prepare the ground before switching the play.
-
Players in a neighbouring zone should actively show for the ball to facilitate a switch.
-
The passing team should use good positioning to make the most of their numerical advantage.
-
The defending team should keep the intensity up and hunt down the ball.
-
Defenders should anticipate passes.
-
It is important to put the opposition under pressure.
Activity 6: 8+GK plus 3 v 8+GK
In this exercise, the team in possession should look to exploit their numerical advantage by switching play to move the ball towards goal.
-
Set up a 70m-long playing area with two goals (each guarded by a goalkeeper) diagonally across from each other, as shown in the illustration. Then divide the playing area lengthways into 2 zones.
-
Form two teams of 9 players (including goalkeepers).
-
Choose 3 “neutral” players.
-
Position 2 coaches as shown in the illustration, each with a supply of balls.
-
Coach 1 will play the ball in for the blue team; Coach 2 will play the ball in for the red team.
-
A coach (in this example, Coach 1) starts the exercise by passing the ball into play.
-
The exercise is played 9+3v9.
-
Only 1 player from each team and 1 neutral player (i.e. a total of 3 players) are allowed to stand on the opposite side of the playing area from where the ball is.
-
2 of the neutral players stay close to the ball to create overloads. The other neutral player stays away from the ball to provide a passing option.
-
If a goal is scored or the ball goes out of play, play restarts with 1 of the coaches.
-
The defending team should press high to even up the numbers temporarily (or even give themselves a numerical advantage).
-
The attacking team should exploit their numerical advantage.
-
Decision-making is key: players should consider whether to get the ball forwards quickly or switch the play.
Activity 7: The 2v1 spider’s web
This exercise is about targeting specific areas of the pitch to create 2v1 situations, and then exploiting them to move the ball towards goal.
-
In half of a full-size pitch, set up one full-size goal (guarded by a goalkeeper) and two mini-goals. Then mark out a middle zone with two defensive lines as shown in the illustration.
-
Form a blue team with 10 players and a red team with 7 players (including the goalkeeper).
-
Position the red defenders on the defensive lines as shown in the picture.
-
Position 1 winger, 1 player in the half-space and 1 wing-back in each of the wide zones. In the middle zone, set up with 2 holding midfielders and 1 striker.
-
When the ball is played out to the flanks, the defender is allowed to leave their defensive line. The attackers play 2v1 against the defender and try to get over the line.
-
Once a defender is beaten, they cannot come back into the move. The attacking team then play 2v1 again
-
If the attacking team manage to reach the penalty area, they can link up with the striker.
-
If the defenders win the ball, they should counter-attack towards the mini-goals.
-
When the ball is played to either of the holding midfielders, they play 2v1 against the defender and try to get over the line.
-
When the ball is passed to the striker, both midfielders can move up in support and attack the goal in a 3v1.
-
Beaten defenders cannot rejoin the move.
-
If the defenders win the ball, they should counter-attack towards the mini-goals.
-
Allow beaten defenders to carry on and help their team-mates further back.
-
Defenders should put their opponents in two minds.
-
1v1s can be created by blocking passing lanes.
-
The attacking team should make the most of their 2v1 situations.
-
Attacking players should take defenders out of the game both in possession and through off-the-ball runs.
-
Progression into the next zone should be done at pace.


